 ROBOTWORLD / RETOUCHPI
RetouchPi
Open the browser and retouch: forty-nine professional tools, and PSD files open and save back
RetouchPi is a retouching bench that lives in your browser: nothing to download, no account, no payment, you just open it and start. The lassos and the magic wand circle the part you want to change, spot healing and the clone stamp rub out what you do not want, crop straightens a photo that came out tilted, and layers, masks and adjustments let you build the edit up one step at a time the way a desktop editor does. A Photoshop PSD opens as itself and saves back with its layers and masks intact. Your images are processed on this computer from start to finish: nothing is uploaded and nothing is watermarked. This page is the door - pick an image, or paste a screenshot, and you are on the canvas.
This is a public beta. It already does real work, and it still has rough edges we have not smoothed out - tell us when you hit one and we fix what we can the same day.
What it does
What it can already take off your plate
The beta carries a complete retouching path, from selection to repair to layers to export. Everything below works today; none of it is a roadmap promise.
Circle the part you want to change
Rectangular and elliptical marquees, three lassos (polygonal by clicks, magnetic by edge), magic wand, quick selection and object selection. Selections add, subtract, intersect, feather and invert, and the marching ants trace the real outline rather than a convenient box.
Rub out what should not be there
Spot healing brush, healing brush, patch, content-aware move, magic replace, red eye, and the clone stamp beside them. They sample from the surroundings and blend at the edge, so the repair leaves no hard seam - a passer-by, a blemish, a wire across a wall.
Straighten it and crop it
Crop fixes the composition; perspective crop squares up a document, screen or business card shot at an angle - you drag four corners and every layer and mask is pulled along.
Work in layers, as on desktop
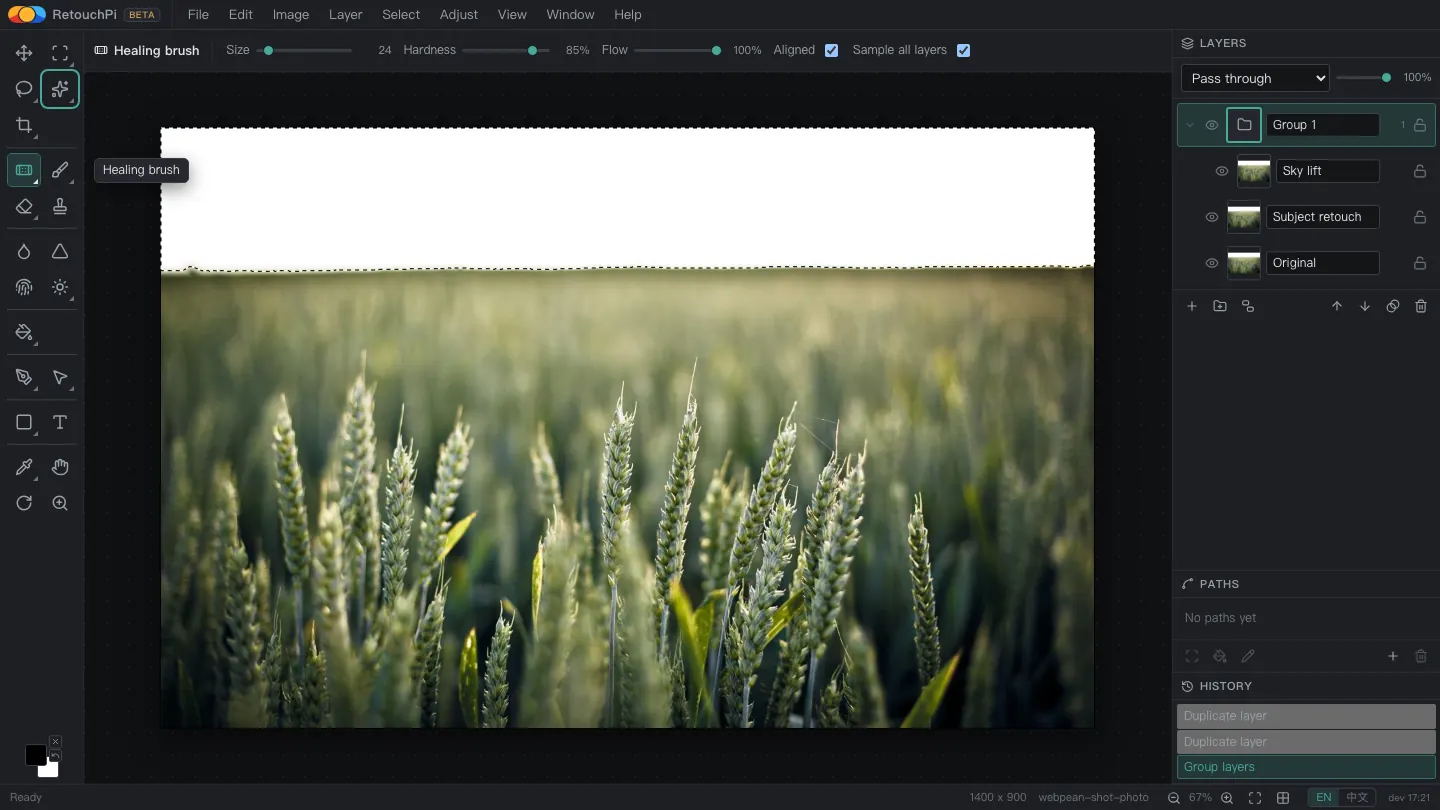
The layer tree carries groups, masks, clipping masks, twenty-seven blend modes with pass-through, adjustment layers and Levels / Curves. The history panel records every step, and stepping back does not cost you the selection.
Type, draw shapes, walk a pen
Double-click a text layer to edit it in place, with face, size, leading and colour on the options bar; shapes are parametric (corner radius, polygon sides, star inner ratio) with twelve custom presets; three pens lay down Bezier paths that load back as selections, strokes or fills as often as you like.
Brushes that follow your hand
Brush, pencil and colour replacement, three erasers, plus blur, sharpen, smudge, dodge, burn and sponge. Size, hardness, opacity and flow apply live, and with a selection on the canvas the paint bucket and the gradient stay inside it.
Open a PSD, save a PSD
A Photoshop PSD (8-bit RGB subset) opens with its layers, masks and blend modes, and saves back so someone else can carry on. Exporting PNG or JPEG for the web is one command each.
Your muscle memory still works
Single-key shortcuts sit where the desktop editors put them, with Ctrl+T free transform, Ctrl+G group, Ctrl+Alt+G clipping mask and Ctrl+Z undo. The full key list is in the tool table below.
Getting in
Three ways to put a picture on the canvas
Pick a file, paste a screenshot, or walk in empty-handed. The picture stays on your computer the whole time: we never receive it and could not if we tried.
Pick a local file
The button takes an image or a PSD: an image opens at its own pixel size with its file name as the document name; a PSD opens as the layer stack inside it (8-bit RGB subset), layers, masks and blend modes included. It is the same path as File - Open once you are inside.
Paste with Ctrl+V
Paste an image or a PSD from the clipboard anywhere on this page and it lands on the canvas. Pasting while you are already editing behaves the way you would expect: an image becomes a new layer, a PSD becomes a new document. The fastest road in for a screenshot.
Walk in empty-handed
The link beside the button opens the editor on its default canvas. Paint, paste, or drop a file onto the window once you are in - all of it works.
Promise
Your pictures never leave your computer
This is not a slogan, it is how the thing is built. Retouching belongs on your own machine; our job is to hand you the tools.
No uploads
Images are decoded, edited and exported on this computer. There is no upload button, and there is no copy of your file on a server.
No sign-up
No account, no login, no modal standing between you and the canvas. Open it and work; close it and you are done.
No watermark
The PNG and JPEG you export are clean: no corner stamp, no size limit, no limit on how many you make.
The files are yours
A PSD opens as itself and saves back with layers and masks intact, and the project file stays in your hands - take it to another machine and keep going.
Tools
Forty-nine tools, in toolbar order
The numbers are the toolbar order, top to bottom. Single-key shortcuts match the desktop editors: V move, M marquee, L lasso, W wand, C crop (Shift+C walks to perspective crop), J spot heal, B brush, E eraser, S clone stamp, O dodge, G paint bucket, P pen, A path selection, U shapes, T text, I eyedropper, H hand, R rotate view, Z zoom; blur, sharpen and smudge carry no single key, exactly as on desktop; grouping is Ctrl+G / Ctrl+Shift+G and free transform is Ctrl+T.
Capability
Six tool families
A family is how tools of one feel group together in prose, not a grouping in the UI; the number ranges follow the toolbar list above. All six work today, PSD read/write and Levels / Curves included.
Selection 01-09
Rectangular and elliptical marquees, the three lassos (polygonal by clicks, magnetic by edge), magic wand, quick selection and object selection. The marching ants trace the outline that was actually computed, not an approximation; selections add, subtract, intersect, feather and invert.
Retouch 10-17
Crop leads, and perspective crop straightens the quad you drag, so a document shot at an angle comes out square with every layer and mask warped along with it. Then spot healing brush, healing brush, patch, content-aware move, magic replace and red eye: pixels sampled around the target fill it, blended at the boundary so the repair leaves no hard edge. The clone stamp lives in the brush family and feels the same.
Brushes, erasers and fills 18-32
Brush, pencil and color replacement brush, clone stamp, the six keyless tools blur, sharpen, smudge, dodge, burn and sponge, plus eraser, background eraser and magic eraser. Size, hardness, opacity and flow apply live. The paint bucket and the gradient belong to this family too: with a selection on the canvas both stay inside it.
Pens and paths 33-37
Pen, freeform pen and curvature pen lay down Bezier paths; path selection and direct selection move anchors and handles. In the paths panel a path can be loaded back as a selection, stroked or filled again - it is not a one-shot stroke.
Shapes 38-43
Rectangle, ellipse and line, a parametric shape with corner radius, polygon sides and star inner ratio, and a custom shape with twelve presets; the dragged box is the shape's bounding box and the options bar edits it live.
View and measure 44-49
Beside text and the eyedropper: the color sampler reads several points into the status bar, the ruler measures distance and angle, the hand pans, rotate view turns the view without turning pixels, and zoom inspects; size and zoom stay live in the status bar.
Four things you can count
tools in the column, in six families
layer blend modes, pass-through included
commands across the nine menus
panels on the right: layers · brush · paths · history
Layers
The layer panel is a tree
Layers, groups and masks live in one tree: groups collapse and blend pass-through, masks hang off layer nodes, and the marching ants follow the mask's real outline. The history panel records every step and rolls back without losing the selection.
Groups and pass-through
Layers group, nest and collapse; a group's blend mode can be pass-through, so child blending happens inside the group first - the same semantics as the desktop editors.
Masks
A layer mask controls visibility in greyscale and takes brush and gradient strokes; selection to mask and mask to selection are each one menu command. Clipping masks are of the same family: Ctrl+Alt+G makes a layer take the shape of the one below it, and the row prints a down arrow in its left gutter.
Blending and opacity
Twenty-seven blend modes composite per layer in real time, with opacity and visibility live; the panel and the canvas read one state, so you never get the panel saying one thing while the canvas says another.
Next
The first online photo editor built to be driven by agents
RetouchPi is being wired up to agents: soon you say "swap this background for a seaside dusk" or "crop this batch to 1:1 and take the passers-by out", and it picks the tools, does the work, and hands the result back for you to approve. That layer is still on the way - leave an address and we will write once, the day it is ready.
Beta desk
Two things, a dozen seconds each
During the beta these are the two things we want from you: an address so we can tell you when agent control lands, and whatever is annoying you. One card for each, and neither needs an account.
Leave an email, hear about agent control first
One message, the day it actually works. Nothing else, ever.
The address is used for that one announcement only: never passed on, never repurposed, and deleted whenever you ask.
Something feels wrong? Tell us
This is exactly what a beta needs. A tool that will not fire, a result that is not what you asked for, a step that crawls - write it down and send it. No email needed, no account.
Roadmap
Three things not in this release yet
Better said plainly than left vague: those three sit in the later stages of the roadmap and are not in this release. Layer masks, clipping masks, adjustment layers, Levels / Curves and all ten layer styles are already in; text layers and brush settings are editable; a Photoshop PSD opens and saves back (8-bit RGB subset). The filter family is the next release - the core path stands up first, then we build on it. The project file is RetouchPi's own JSON; export is PNG and JPEG for now.